 Placing your embroidery can be made easy if you have the right tools for the job. Have you ever been been in the middle of making a monogram or design on a shirt for someone else and wondered if the design was to high or low. Nothing worst then putting a monogram under someones arm pit or too high on the shoulder. You can not try the shirt on because the size and position are different.  Tools for placement make all the difference.
“Embroiderer’s Buddy” comes in adult and child sizes and will place your design perfectly according to the size. Pick the shirt size on the on the “Embroiderer’s Buddy”. Press the shirt in half. Align and place the “Buddy” on the center fold. Place the shoulder size marking on the shoulder of your shirt. Mark the centering position on your shirt. To see this better click on the picture to make it larger.
 Another tool that I love is the Embroiderers Friend. For production work you need exact positioning and you need to do it fast. Pre set the hoop location and size on the EmbroiderersFriend.  The Embroiderers Friend allows you to dress the shirt on a form and hoop quickly in the same location over and over again.  The Embroiderers Friend holds all brands and sizes of hoops exactly in position and perfectly straight for all flat items and women and men’s garments up to men’s 3X.
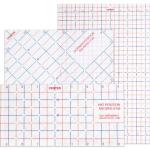
 Another great tool to try is the EmGrid. Jenny’s Sewing Studio sell EmGrid in a 3 grid package set. Each grid is used for a different positioning job.
1. Place Grid over shirt or other item to be marked .
.
2. Center Grid and mark the location for your design using your favorite marking tool.
3. Mark center dot, dot above and below center dot, and a dot to the left and right of center
4. Remove the grid and draw a vertical line and horizontal line through the center dot to mark a cross hair for the center of the design.
In the package of EmGrid’s is a diagonal grid. It is perfect for marking napkins, pillows and anything on the diagonal. All you need to know is how big your design is. The diagonal grid works well for mirroring images.
Great for:
– Corners on blankets
– Napkins
– Towels
– Shirt collars
Finally the last EmGrid grid included in the set is for above pockets and small areas.  Â Just place the grid above the pocket and mark. If you know the size of your embroidery just divide it in half to find the center. You can visually see the positioning using the grid. As always, I print a template of my design so I can see it positioned.
 Just place the grid above the pocket and mark. If you know the size of your embroidery just divide it in half to find the center. You can visually see the positioning using the grid. As always, I print a template of my design so I can see it positioned.  I can also see the exact size and how it will look in the position I have placed it in.
I hope you enjoy making your embroidery presents. Remember these great positioning tools.


